How Do I Set Up Print Bleed for Full-Bleed Custom Stickers?
What exactly is "bleed," a term we hear so often in printing? Why is it crucial for full-bleed stickers? StickerHD guides you through the basics of print bleed. Learn how to avoid uneven white edges, handle complex backgrounds or photos, and apply these tips to your Die-Cut Stickers and Sticker Sheets!
What exactly is "bleed," a term we hear so often in printing? This article will guide you through the functions of bleed and how to create it in an easy-to-understand way.
What is Print Bleed? Why Do We Need It?
"Bleed" refers to extending full-bleed design elements like backgrounds or base colors slightly beyond the die-cut line. This prevents uneven white edges or accidental cut-offs of critical content due to slight mechanical cutting shifts during the printing process.
It might sound a bit technical, but to put it simply: if certain designs don't have bleed setup, inevitable mechanical cutting errors will result in the following disasters:


Generally speaking, StickerHD can help you handle bleed production, but there are situations where we cannot do it for you, such as with "photos" or "designs with complex backgrounds."
Scenarios where StickerHD CAN Help You Create Bleed: Full-Bleed Solid Color Borders
If your artwork consists of a full-bleed solid color block or a solid border, StickerHD will automatically extend the bleed border outward for you to achieve a flawless finished product.


Scenarios where StickerHD CANNOT Help You Create Bleed: Photos and Complex Backgrounds
If reserving bleed is not an option, we recommend adding an "outward white border" or a border of another color. We suggest making this border larger than 1.5mm so that any minor cutting errors won't be noticeable. If you prefer not to have a colored border, we highly recommend opting for Transparent Stickers—that way, your borders will be perfectly clear!


What Should I Do If I Can't Reserve Space for Bleed?
If reserving bleed is not an option, we recommend adding an "outward white border" or a border of another color. We suggest making this border larger than 1.5mm so that any minor cutting errors won't be noticeable. If you prefer not to have a colored border, we highly recommend opting for Transparent Stickers—that way, your borders will be perfectly clear!


Conclusion
By now, everyone should have a clear understanding of what bleed is. When done right, it yields fantastic results!
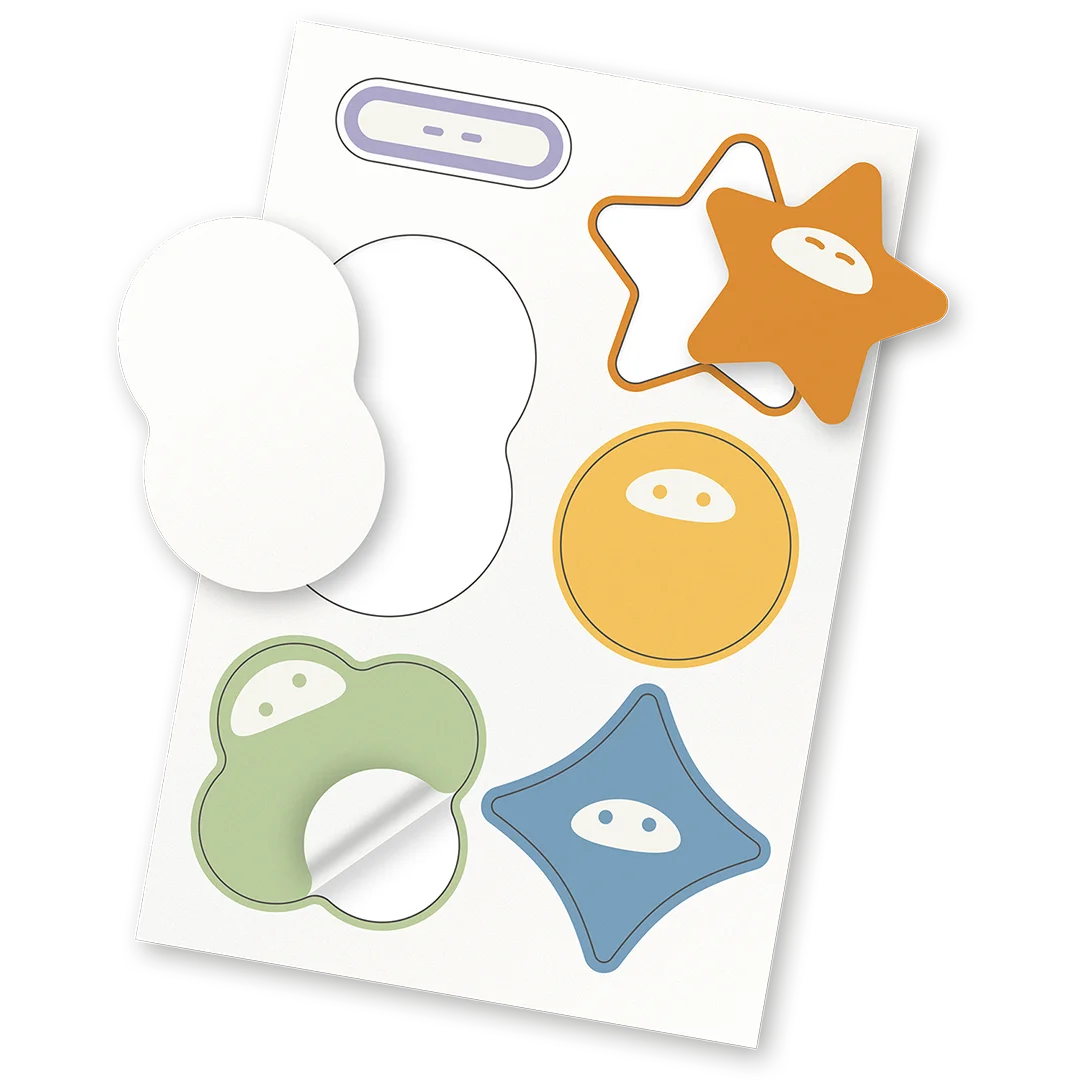
Below is an example of a full-bleed Washi Sticker Sheet. If you want to make a full-bleed Sticker Sheet, remember to set up bleed for every single pattern on the sheet!


This concludes our tutorial on creating print bleed for stickers. We hope this helps everyone smoothly achieve their desired printing effects!